

How much height does floor heating add?
It depends on the system. A poured screed can lift a floor by 70–110 mm before the floor finish goes down. A dry panel over an existing floor adds 22–30 mm. Electric cable under tiles can add as little as 5–8 mm. In a new slab, the pipes add no height at all. The table below shows each option measured to the top of the heating layer, so you can add the thickness of your chosen floor finish.
Build-up heights compared
| System | Build-up | Ready for timber / SPC / carpet | Ready for tiles |
|---|---|---|---|
| HOYA Ondol dry panel | 1.7 mm reflective foil + 26 mm panel | 27.7 mm | 33.7 mm (with 6 mm tile board) |
| Warmboard-R dry panel | 20.6 mm panel on 1.7 mm reflective foil, or on a vapour barrier (about 1 mm) | 22.3 mm with foil, about 21.6 mm with a vapour barrier | 28.3 mm with foil, about 27.6 mm with a vapour barrier (with 6 mm tile board) |
| Warmboard-S over an existing floor | 28.6 mm structural panel | 28.6 mm | 34.6 mm (with 6 mm tile board) |
| Warmboard-S over joists | 28.6 mm structural panel replaces the floor sheet | About 10 mm more than a 19 mm floor sheet | About 16 mm more (with 6 mm tile board) |
| Foam panels with aluminium foil | 30 mm grooved XPS foam board with a bonded aluminium foil top | 30 mm | 36 mm (with 6 mm tile board) |
| Low-profile wet system | Pipe sheet + poured levelling compound | About 15 mm | About 15 mm |
| In-screed | Insulation board + 50–70 mm poured screed | About 70–110 mm | About 70–110 mm |
| In-slab (new builds only) | Pipes cast into the structural slab | 0 mm above the slab | 0 mm above the slab |
| Plates between the joists (suspended timber floors) | Heat-spreading plates and pipe fixed under the existing floorboards, from below | 0 mm above the floor | 0 mm above the floor |
| Electric cable under tiles | 2–3 mm heating cable in at least 5 mm of tile adhesive or levelling compound | Not suitable | About 5–8 mm, plus any insulation board |
| Electric heating under a floating floor | Foil heating mat on a heating underlay, or cable mat under levelling compound and underlay | About 14 mm, including the underlay (floating timber and laminate only) | Not suitable |
| Electric cable in screed | Heating cable fixed over the slab + poured sand and cement screed | About 40–75 mm, plus any insulation board | About 40–75 mm, plus any insulation board |
| Electric cable in the slab (new builds only) | Heating cable cast into the structural slab | 0 mm above the slab | 0 mm above the slab |
Heights are indicative build-ups for systems commonly used in Australian homes. HOYA Ondol figures come from our product specification. Figures for other systems are typical published values: actual heights, circuit lengths and warm-up times depend on each manufacturer’s specification and your project. Add the thickness of your floor finish, including any underlay or adhesive, from the flooring manufacturer’s specification. Tiles go on a 6 mm tile board over dry panels.
Wet systems
Wet systems set the pipe in concrete, screed or a poured compound. Anything poured has to cure or dry before the floor finish goes down.
Wet system · New slabs only
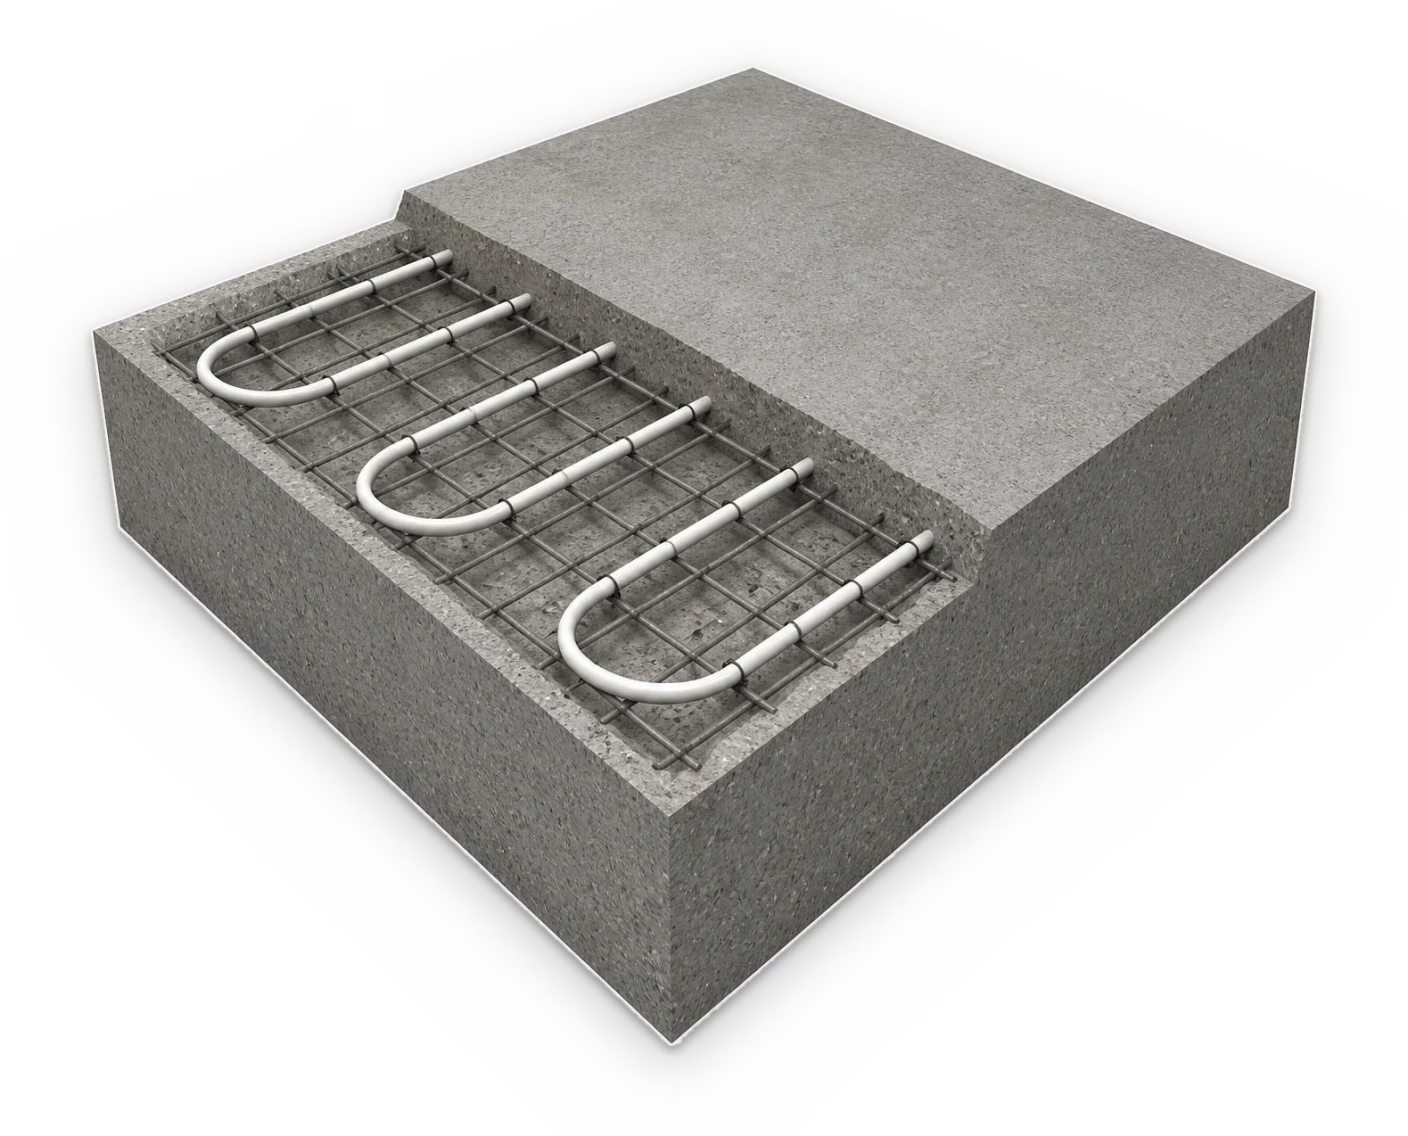
In-slab
Added height: none (cast into the slab)
16 mm PEX, PE-RT or multilayer PEX-AL-PEX pipe is tied to the slab reinforcement, usually at about 200 mm centres in circuits of up to about 100 m, and cast into the concrete when the slab is poured. It adds no height, but it can only go in while the slab is being built.
Advantages
- Adds no height when the slab is being poured anyway.
- The pipe is protected inside the concrete.
- The slab's mass holds and releases heat evenly.
Disadvantages
- New slabs only: it can't be added to an existing floor.
- Slow to warm up and cool down because of the concrete mass.
- The pipe can't be reached once the concrete is poured.
- Needs R1.0 slab-edge insulation (NCC 2022 Housing Provisions 13.2.6).
Best for: New builds where the slab hasn’t been poured yet.
Wet system · New builds and major renovations
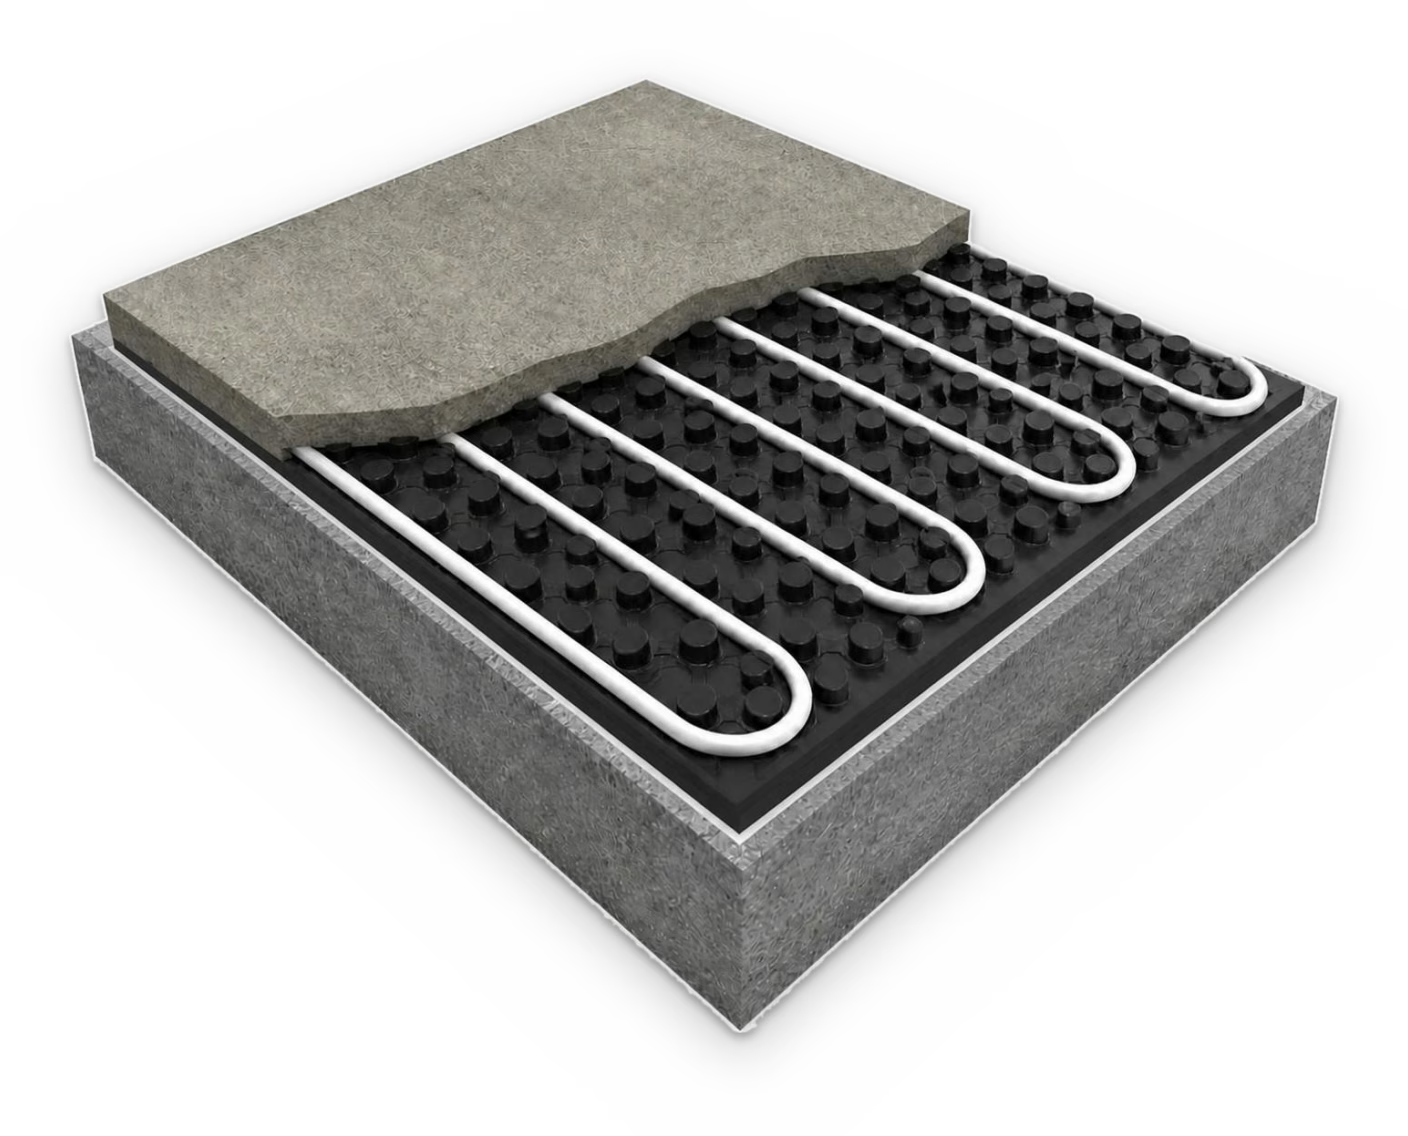
In-screed
Added height: about 70–110 mm, before the floor finish
16 mm PEX, PE-RT or multilayer PEX-AL-PEX pipe is clipped to an insulation board and covered with a poured sand and cement screed. Australian suppliers publish minimum screeds of 50–70 mm over insulation boards of 20–37 mm.
Advantages
- Even heat across the floor.
- Suits most floor finishes.
Disadvantages
- Adds the most height of the systems on this page.
- Heavy: wet screed weighs about 120 kg/m².
- The screed must cure before the floor finish goes down.
- One continuous screed spreads heat between rooms and is slow to respond, so room-by-room control is harder.
Best for: New builds, or renovations where the floor level is being raised anyway.
Wet system · Over existing floors
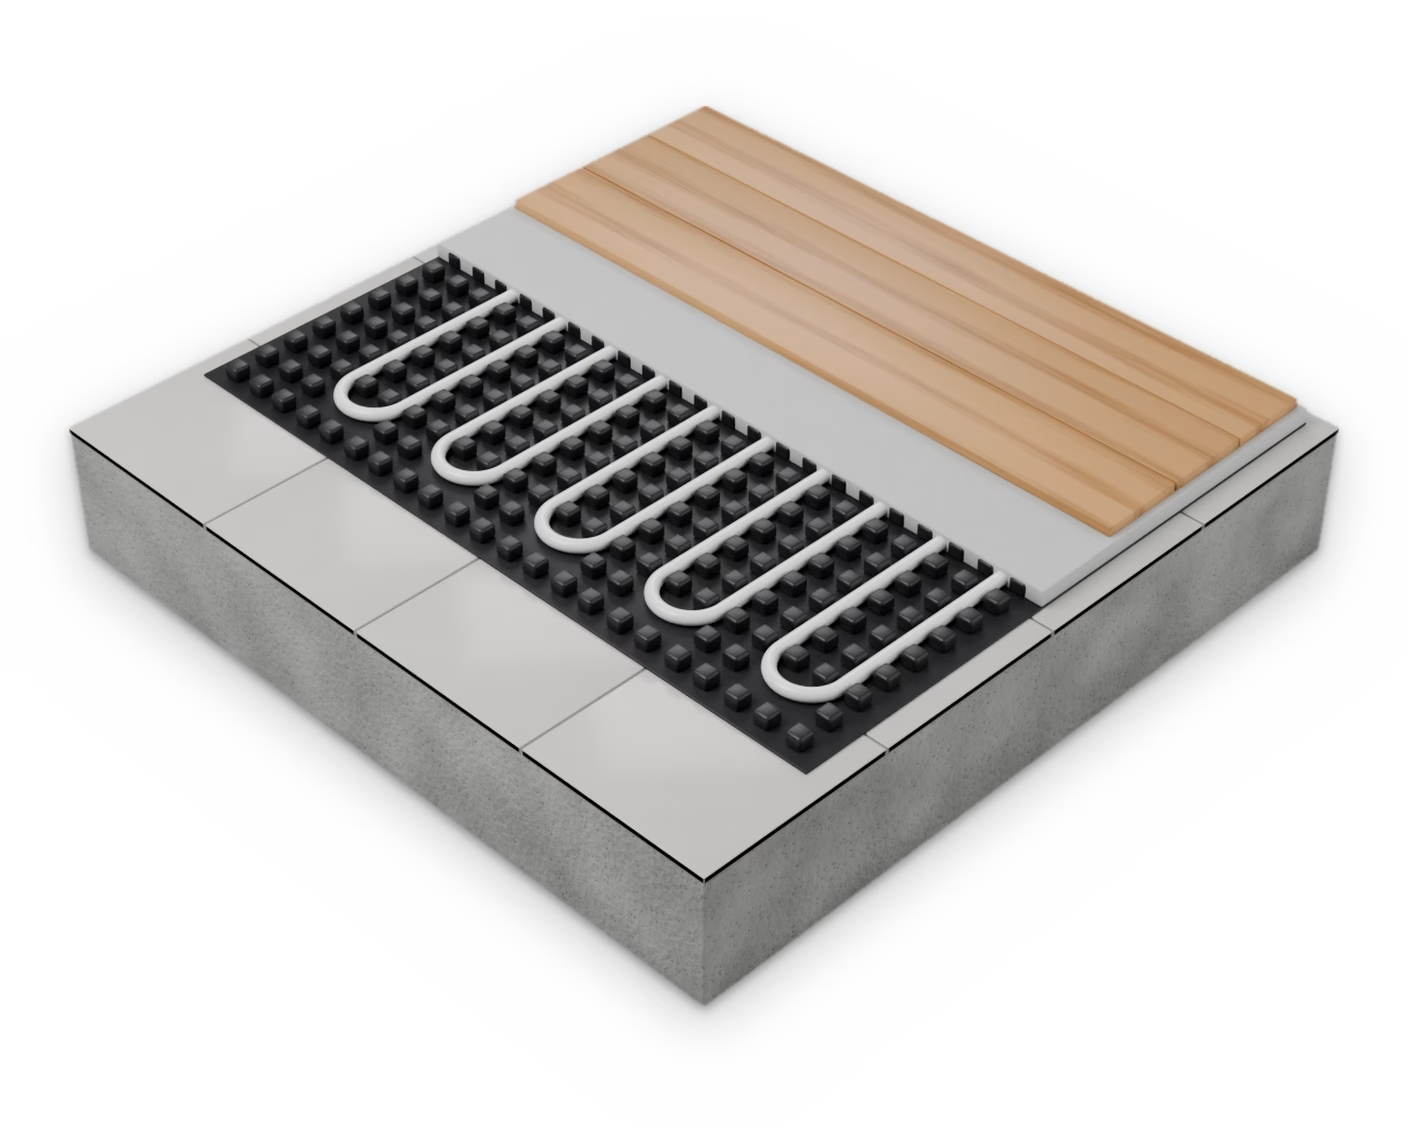
Low profile
Added height: about 15 mm, plus the floor finish
A 12 mm self-adhesive studded sheet holds small-bore pipe (about 10 mm) at close spacing, and a self-levelling compound is poured over it. It is the lowest of the wet systems and can go over a sound existing floor, such as tiles.
Advantages
- The lowest of the wet systems.
- Goes over a sound existing floor, so it suits renovations.
Disadvantages
- The compound must be poured and left to dry before the floor finish goes down.
- Small pipe at close spacing needs more circuits and manifold ports for the same floor area.
- The existing floor must be sound and primed first.
Best for: Renovations where every millimetre counts and a wet trade on site is acceptable.
Dry panel systems
Dry panels hold the heating pipe in a rigid board laid straight onto the subfloor. Nothing is poured, so there is nothing to cure: the floor finish can go down once the system has been pressure-tested and commissioned. For engineered timber, see timber flooring over HOYA Ondol.
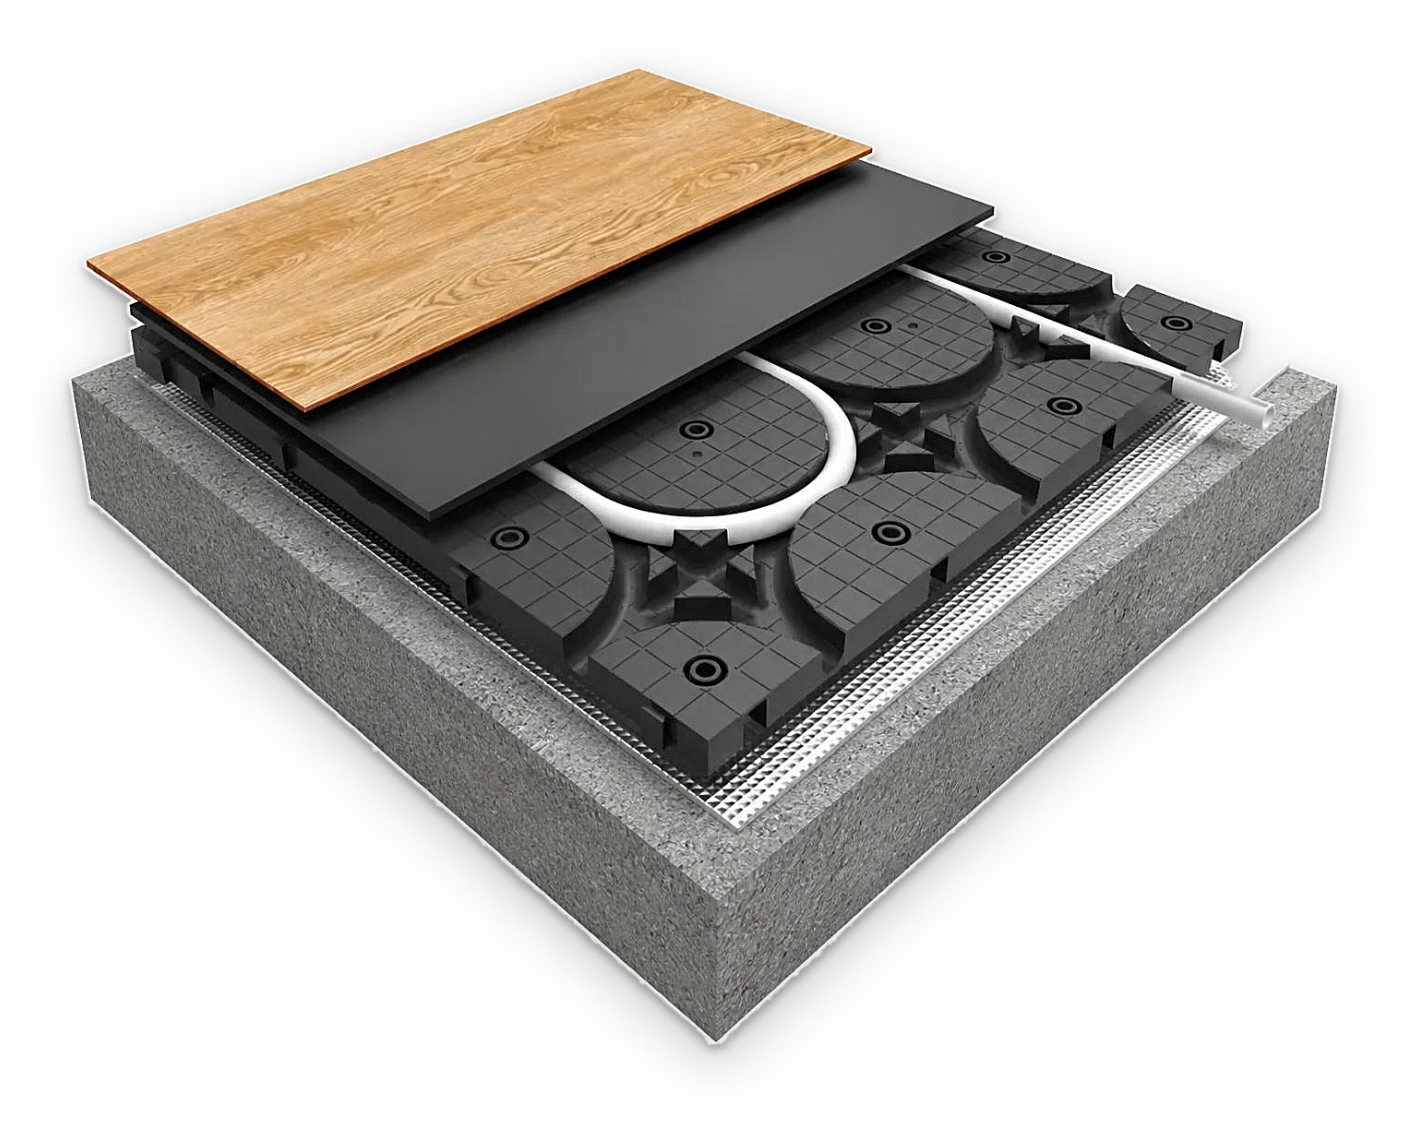
Dry panel · New homes and existing floors
HOYA Ondol panels
Added height: 27.7 mm, plus the floor finish
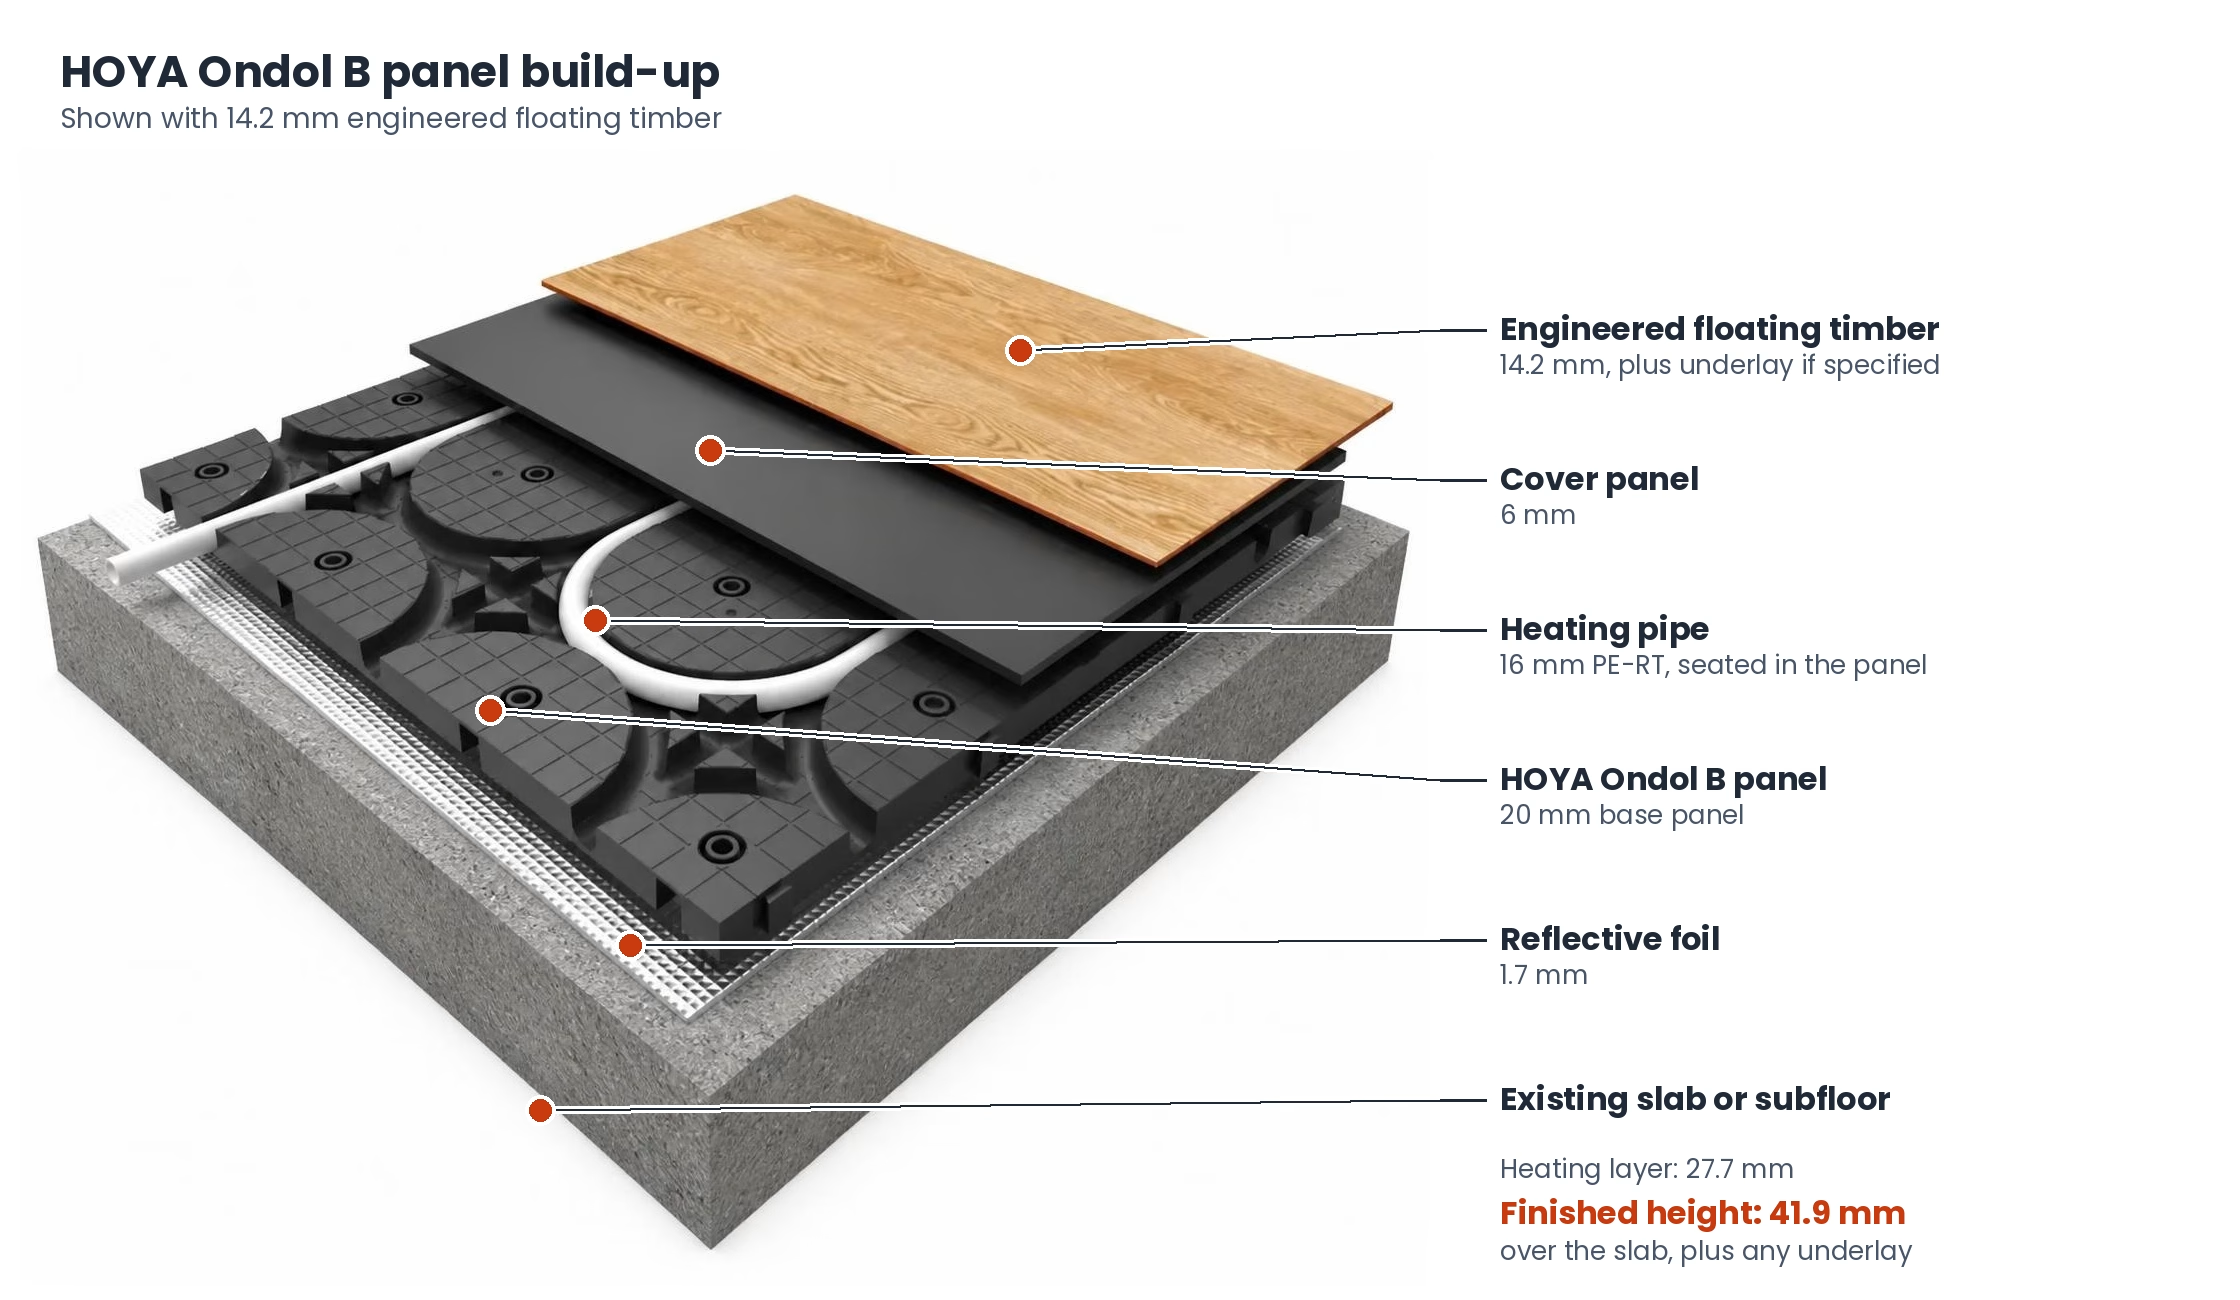
A 1.7 mm HOYA Ondol reflective foil, then 26 mm panels carrying 16 mm PE-RT pipe at 169 mm centres. All three panel types (A, B and C) finish at 26 mm, so they can be mixed across one floor with no step. With 14.2 mm engineered floating timber on top, the finished floor sits 41.9 mm above the slab, plus any underlay. See the panel specifications.
Panels and circuits are laid room by room, so each room can be its own zone: heat the rooms you use, when you use them.
Advantages
- Nothing to pour or cure: the floor finish can go down once the pressure test passes.
- Light: 11.2–16.68 kg/m², against about 120 kg/m² for wet screed.
- Fewer circuits than a low-profile system for the same floor.
- Each room can be its own zone.
Disadvantages
- Higher than Warmboard-R or a low-profile system.
- Uses more pipe per square metre than Warmboard: about 5.9 m against 3.3 m.
Best for: New homes, renovations and extensions, on a new or existing slab or subfloor, with room-by-room control.
Dry panel · New homes and existing floors
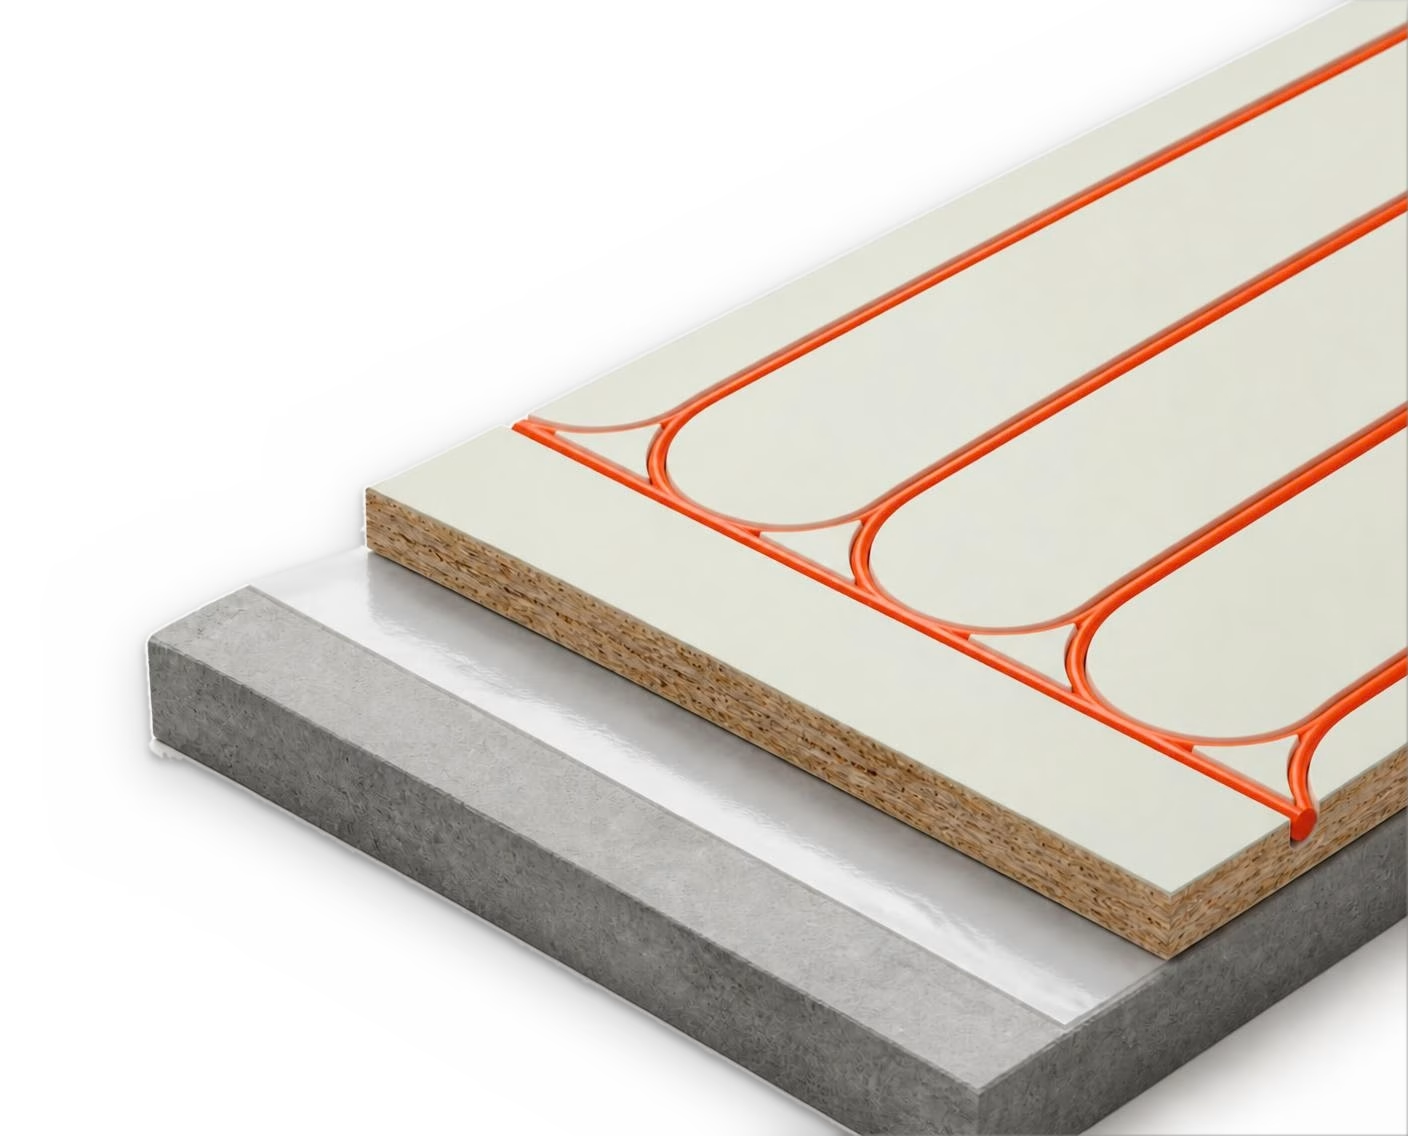
Warmboard-R
Added height: 21.6–22.3 mm, plus the floor finish
Either a 1.7 mm reflective foil, which also acts as the vapour barrier, or a plain vapour barrier of about 1 mm. Then a 20.6 mm Warmboard® OSB panel laid straight onto a new or existing slab or subfloor. A bonded aluminium skin spreads heat from the pipe, which sits in routed channels at about 300 mm (12 in) centres.
Advantages
- Lower than HOYA Ondol panels or Warmboard-S.
- Nothing to pour or cure.
- Wider pipe spacing means fewer, longer circuits: up to about 84 m and 25 m² each.
- With timber glued on top, the floor feels warm within 20–30 minutes. The room itself warms more slowly.
Disadvantages
- Goes over a slab or subfloor, not straight onto joists.
- The OSB panel must be kept dry: water exposure voids the Warmboard warranty.
Best for: New homes and renovations where the lowest dry build-up matters.
Supplied in Australia by Warmboard Australia, with Australian testing and certification.
Dry panel · Over joists or existing floors
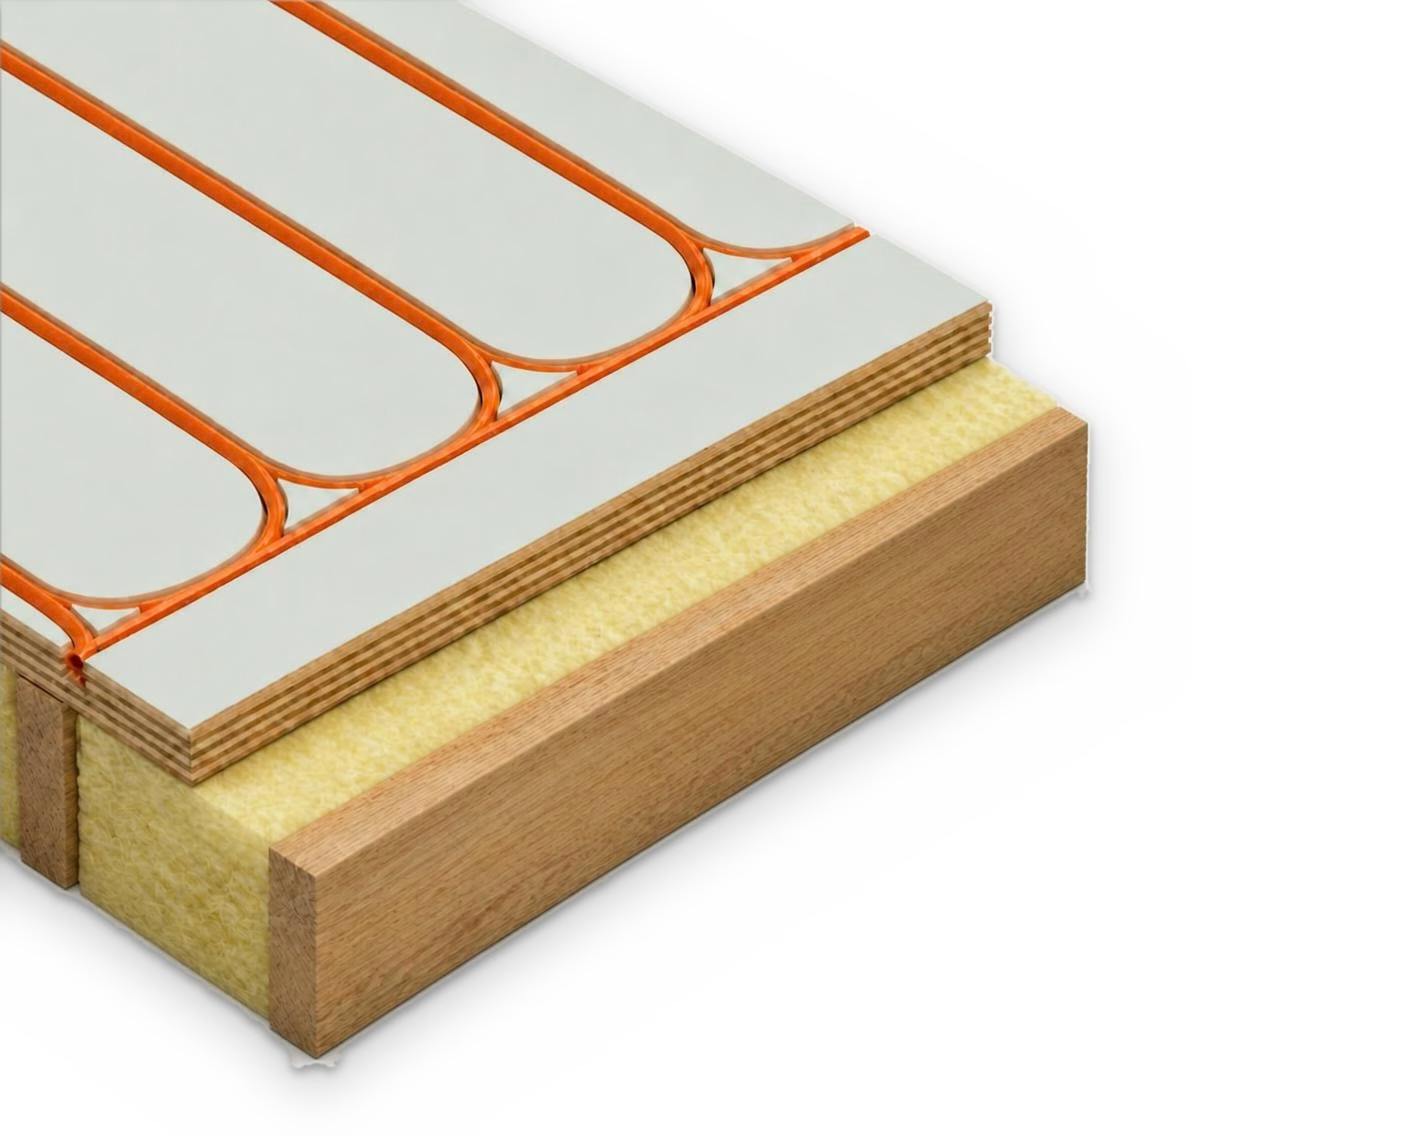
Warmboard-S
Added height: about 10 mm more than a 19 mm floor sheet, or 28.6 mm over an existing floor
A 28.6 mm, 7-ply structural plywood panel with a bonded aluminium top. Over joists it replaces the standard 19 mm floor sheet, so the subfloor and the heating are one layer. The joists are set out at 406.6 mm (16 in) centres, so the 2438.4 mm sheet ends meet over a joist centre.
Advantages
- A structural subfloor and heating panel in one.
- Certified to AS 1170 for a 5 kPa live load and 2.7 kN point loads at up to 410 mm joist spacing. Certificate available on request.
- About 14.5 kg/m².
- With timber glued on top, the floor feels warm within 20–30 minutes. The room itself warms more slowly.
Disadvantages
- Joists must be set out at 406.6 mm centres: wider spacing isn't covered by the Australian certification.
- Over an existing floor it adds the full 28.6 mm.
- No screws or nails within 10 mm of the pipe channels, so fixing must follow the set-out.
Best for: New builds and extensions on joists, or where the subfloor is being replaced.
Supplied in Australia by Warmboard Australia, with Australian testing and certification.
Dry panel · New homes and existing floors
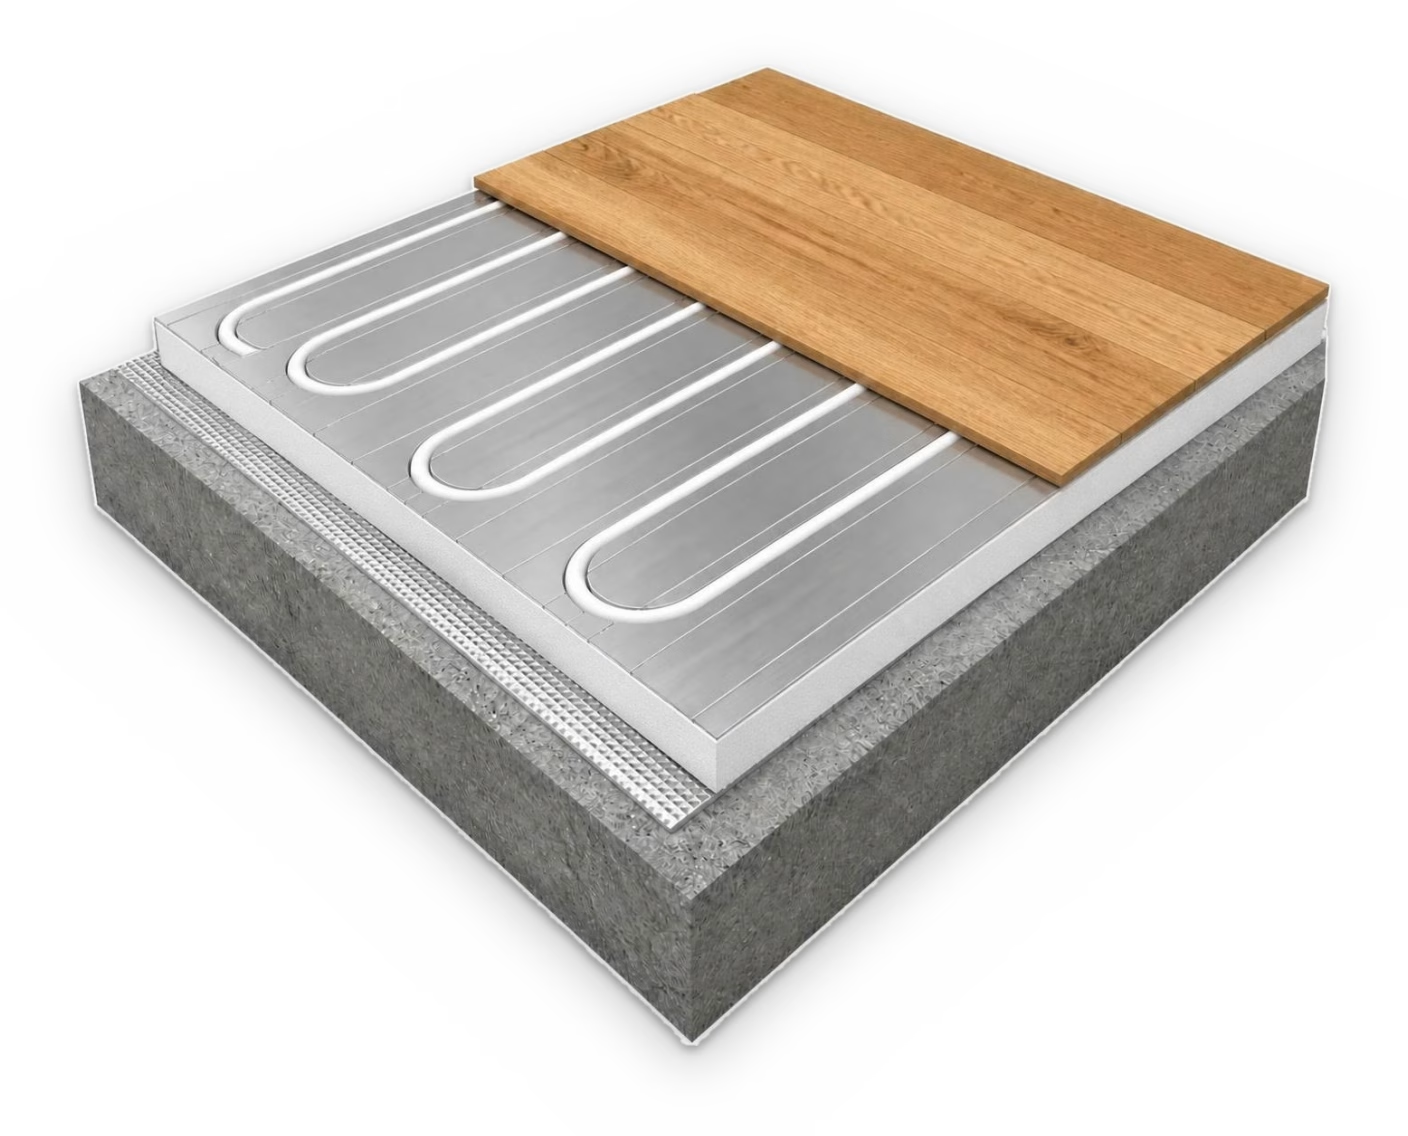
Foam panels with aluminium foil
Added height: 30 mm, plus the floor finish
Rigid 30 mm XPS foam boards with pre-formed grooves for 16 mm pipe, and a bonded aluminium foil top that spreads the heat across the floor. Nothing is poured, so the floor finish can go down once the system has been pressure-tested.
Advantages
- Nothing to pour or cure.
- Light.
Disadvantages
- Higher than HOYA Ondol panels (27.7 mm) or Warmboard-R (21.6–22.3 mm).
Best for: New homes and renovations where a light, dry system is wanted.
Suspended timber floors
Under the floor · Existing timber floors
Plates between the joists
Added height: none
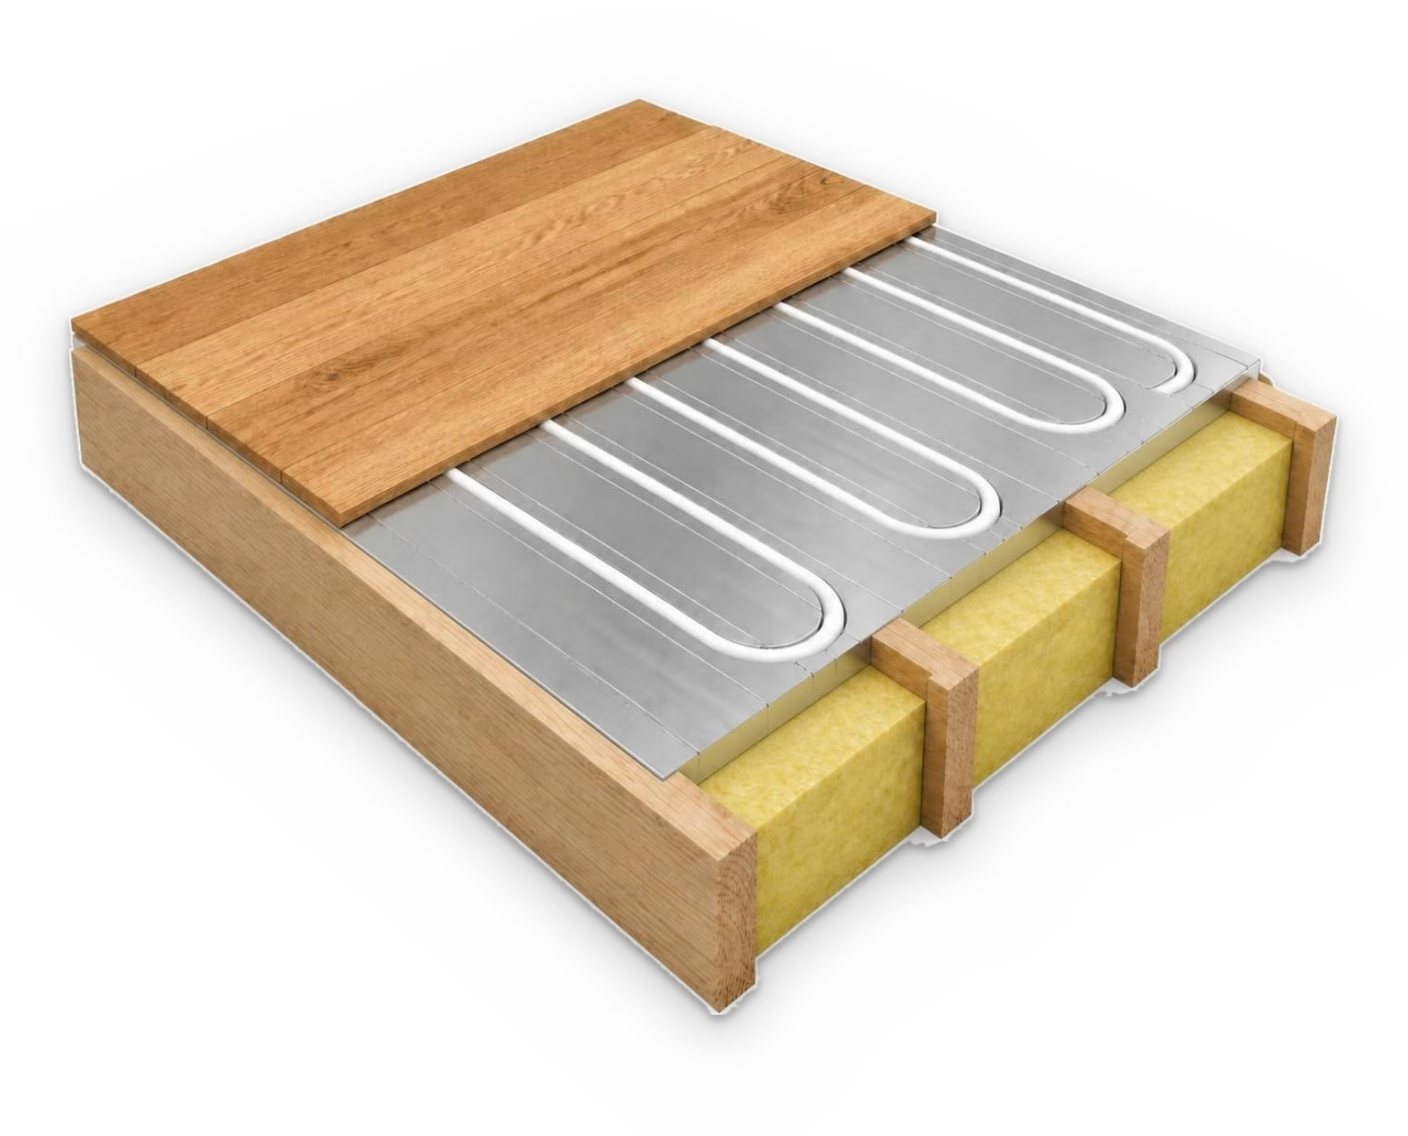
Where there is access from underneath, aluminium heat-spreading plates are fixed between the joists, with the pipe clipped into them directly under the existing floorboards. Nothing is added on top of the floor. Where there is no underfloor access, panels over the existing floor are usually the simpler option.
Advantages
- Adds no floor height.
- Keeps the existing floorboards.
Disadvantages
- Costly and complicated to install: the plates and pipe go in between the joists, from underneath the floor.
- Needs enough clearance under the floor to work from below.
- The bays under the plates must be insulated.
Best for: Homes on stumps or joists with good underfloor access.
Electric systems
Electric floor heating uses a heating cable instead of water pipes. It runs straight off mains power, so every kilowatt of heat uses a kilowatt of electricity. Water-based floor heating can instead run on an electric boiler, or on a heat pump, which typically delivers several kilowatts of heat for each kilowatt of electricity, depending on the outdoor and water temperatures.
Electric · Under tiles and stone
Electric cable under tiles
Added height: about 5–8 mm, plus any insulation board
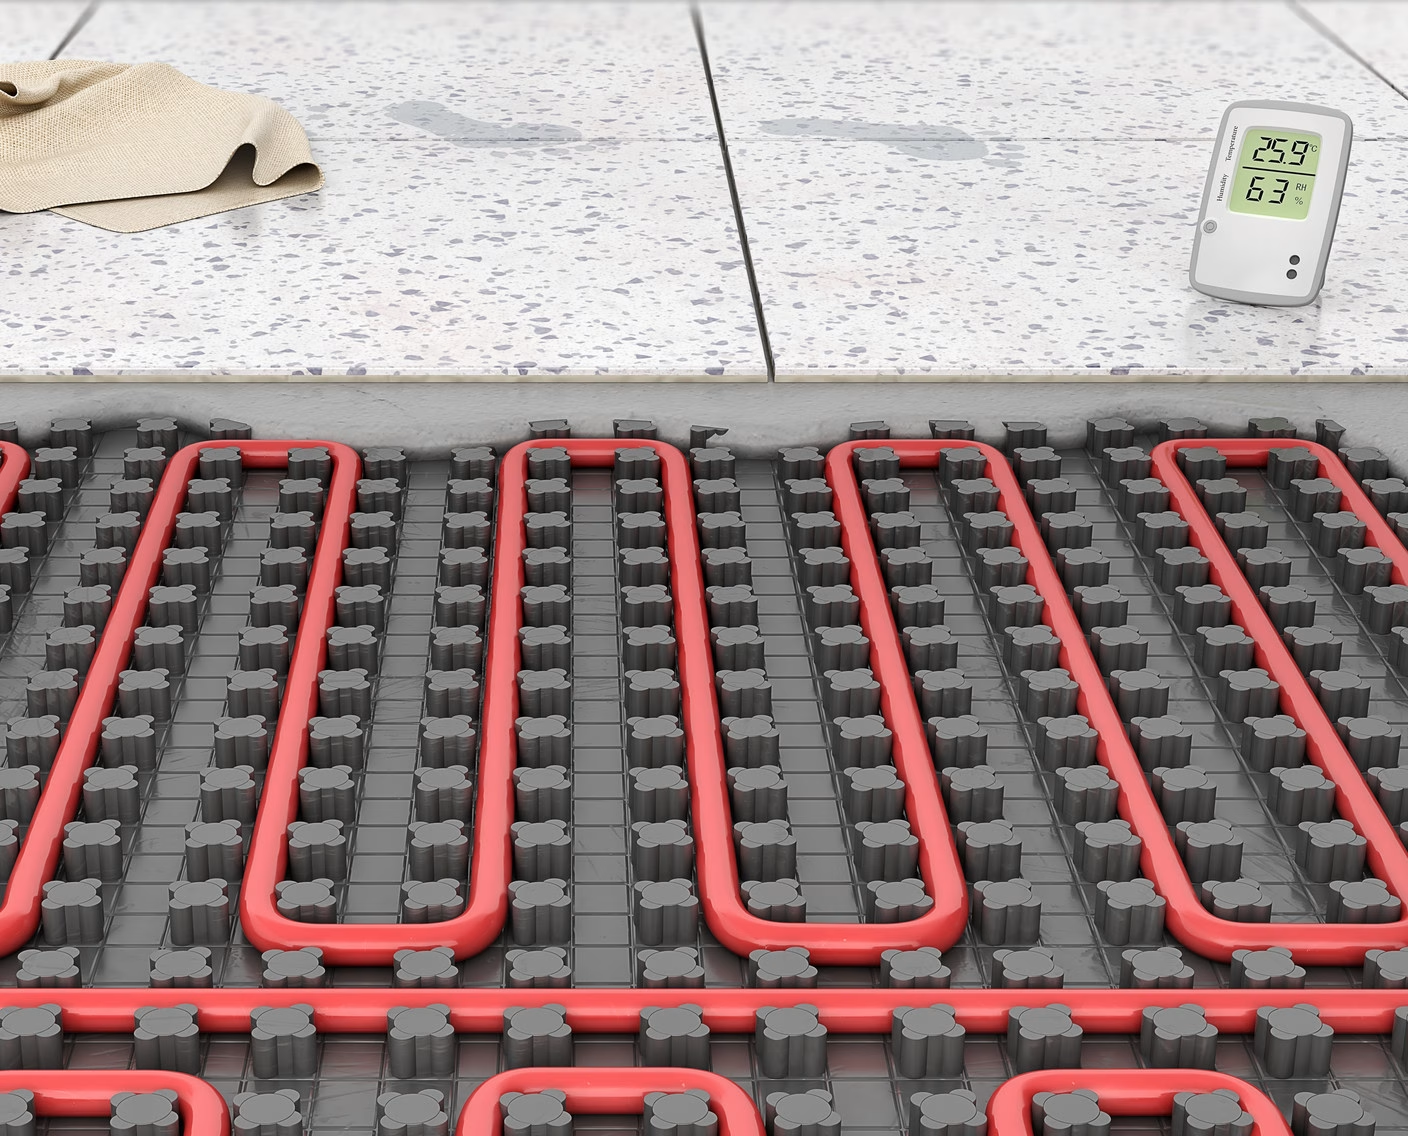
A thin heating cable, about 2–3 mm thick, is laid over the subfloor and covered with at least 5 mm of flexible tile adhesive or levelling compound, then tiled. On a timber subfloor a fibre cement sheet or insulation board goes down first. A 6–10 mm insulation board under the cable helps it warm up faster, and adds that much height.
Advantages
- The thinnest heated floor for tiles and stone.
- Warms quickly: about 20–40 minutes from cold.
- No pipes, manifold or separate heat source.
Disadvantages
- Tiles and stone only.
- The tile adhesive must cure for 7–10 days before the heating is switched on.
- Once tiled over, a damaged cable means lifting tiles to repair it.
Best for: Bathrooms, ensuites, laundries and other small tiled areas.
Electric · Under floating timber and laminate
Electric heating under a floating floor
Added height: about 14 mm, including the underlay
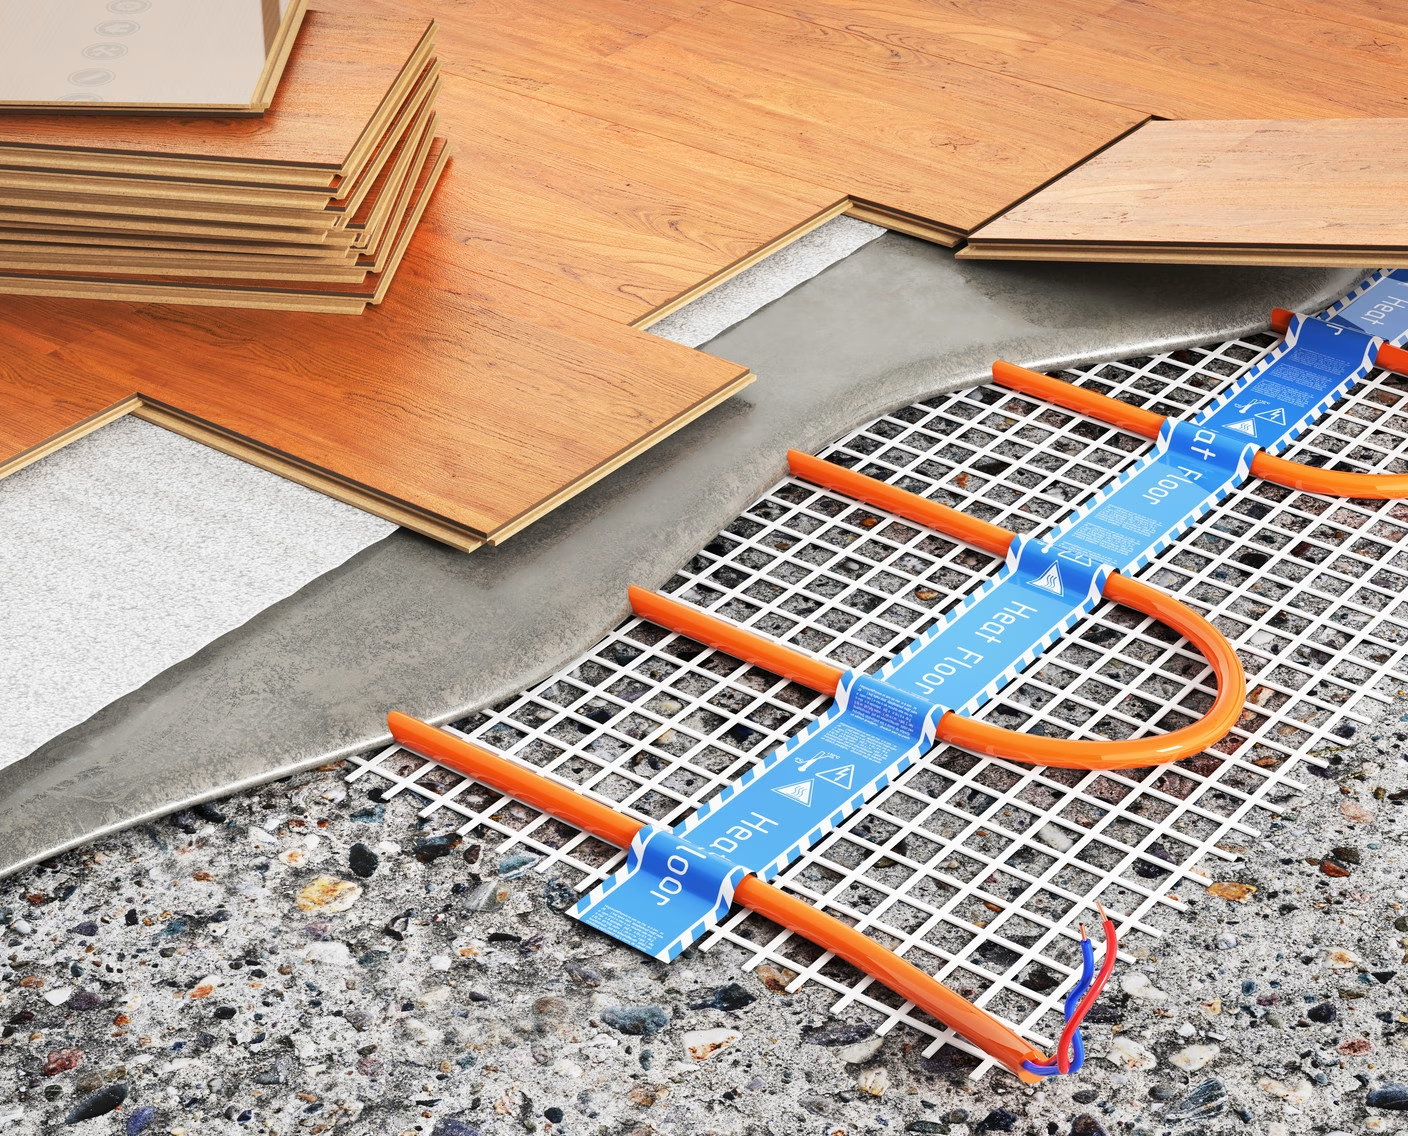
Either a foil heating mat is laid on a heating underlay, or a cable mat is covered with a thin levelling compound and then an underlay. The floating timber or laminate goes on top. A floor sensor keeps the surface at or below 27 °C, the limit timber flooring makers set. Check with your flooring supplier first: some only warrant their boards over electric heating with their written approval, or with a thin screed over the elements.
Advantages
- With a foil mat, nothing is poured or left to cure.
- Goes over an existing floor.
- The floor sensor keeps timber within its temperature limit.
Disadvantages
- Not for tiles, stone, vinyl or nailed-down timber.
- Takes 2–6 hours to reach temperature.
- A levelling compound over a cable mat must dry before the floor goes down.
- Some flooring makers won't warrant their boards over it without approval.
Best for: Single rooms with floating timber or laminate, where no wet trade is wanted.
Electric · New builds and extensions
Electric cable in screed
Added height: about 40–75 mm of screed, plus any insulation board
Heating cable is fixed over the slab, about 75–100 mm apart, and covered with a sand and cement screed. The cable sits in the lower part of the screed, which stores the heat and releases it slowly, so it can be timed to run before you need it.
Advantages
- Suits most floor finishes: tiles, polished concrete, timber, laminate, vinyl and carpet.
- No pipes, manifold or separate heat source.
- Holds heat, so it can run on a timer ahead of use.
Disadvantages
- Raises the floor 40–75 mm, so doors, thresholds and adjoining floors need planning.
- The screed must cure before the floor finish goes down.
- Takes 1–3 hours to warm up from cold.
Best for: New builds and extensions where a screed is going in anyway.
Electric · New slabs only
Electric cable in the slab
Added height: none (cast into the slab)
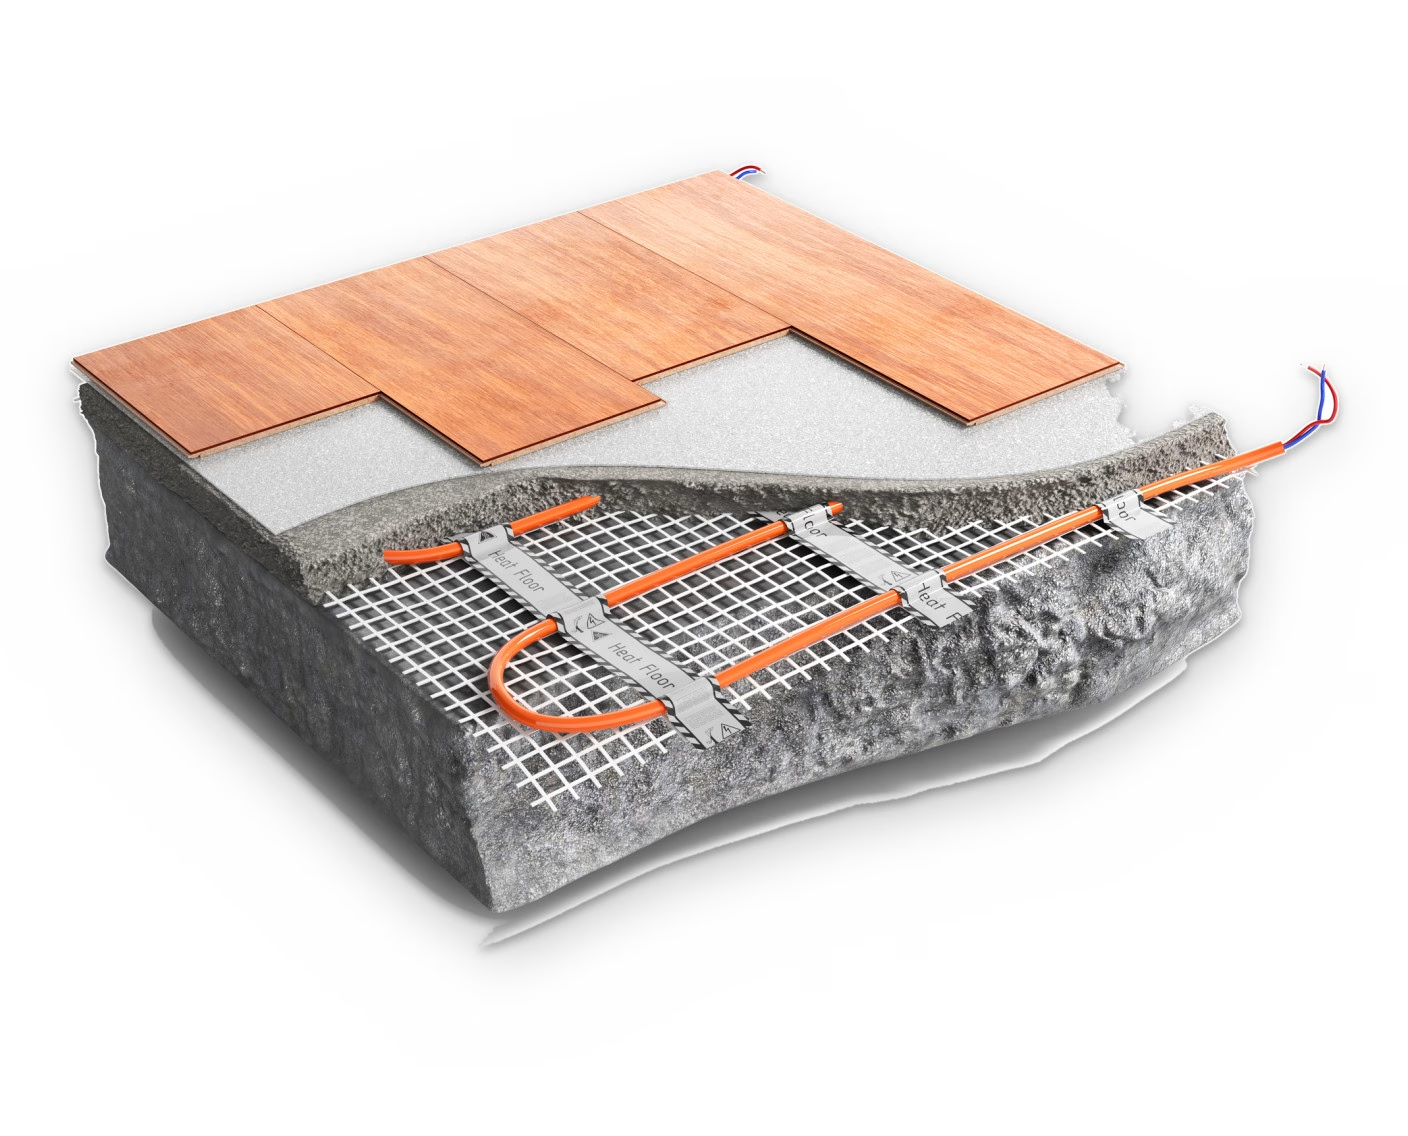
Heating cable is tied to the slab reinforcement, usually about 150–300 mm apart, and cast into the concrete when the slab is poured. Insulation under the slab keeps the heat moving up into the room rather than down into the ground.
Advantages
- Adds no height when the slab is being poured anyway.
- The slab stores heat, so it can be timed to run ahead of use.
- No pipes or manifold.
Disadvantages
- New slabs only: it can't be added to an existing floor.
- Slow to warm up and cool down.
- The cable can't be reached once the concrete is poured, and the floor can't be cut deeply later.
- Needs R1.0 slab-edge insulation (NCC 2022 Housing Provisions 13.2.6).
Best for: New builds where the slab hasn’t been poured yet.
Pipe spacing and circuits
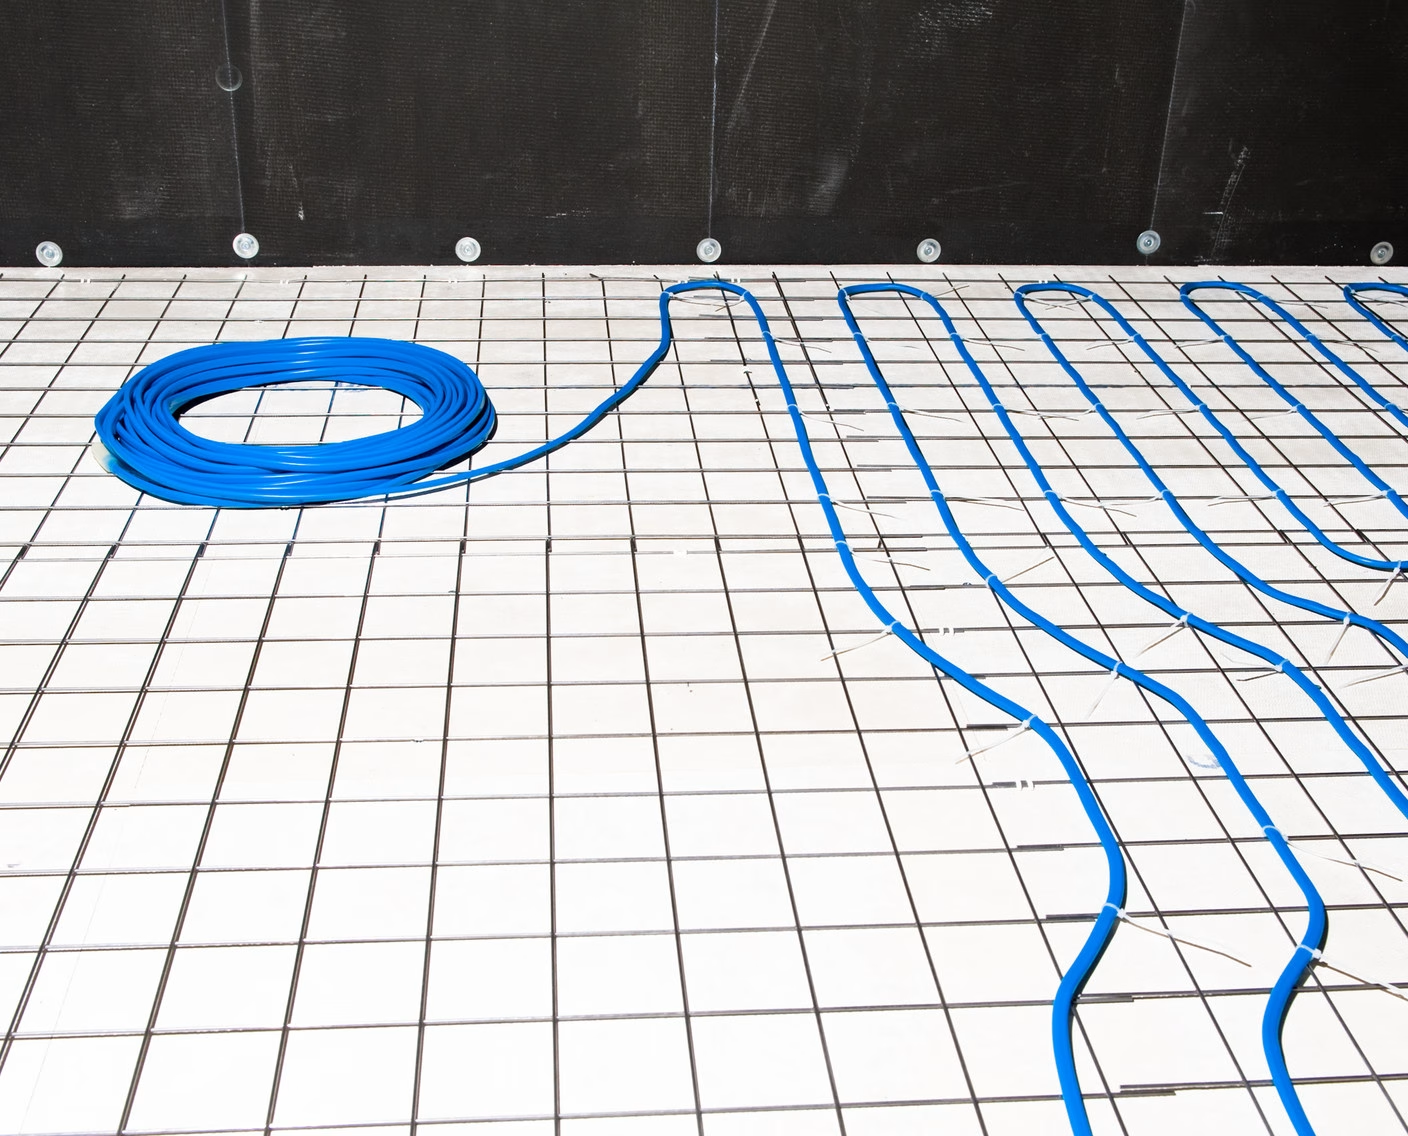
Height is not the only difference. Pipe spacing decides how much pipe goes into each square metre, and so how many circuits (and manifold ports) a floor needs. Each circuit has a maximum length, so closer spacing means more circuits for the same floor.
HOYA Ondol
- Pipe: 16 mm PE-RT
- Spacing: 169 mm
- Maximum circuit: 90–95 m
- Floor per circuit: up to about 15–16 m²
Warmboard-S and -R
- Pipe: 1/2 in (16 mm) multilayer PEX-AL-PEX
- Spacing: about 300 mm (12 in)
- Maximum circuit: about 84 m (275 ft)
- Floor per circuit: up to about 25 m²
Low profile (wet)
- Pipe: 9.9 mm
- Spacing: 50–150 mm
- Maximum circuit: 80–100 m
- Floor per circuit: about 4–10 m² at 50–100 mm
Floor per circuit is an upper limit: the pipe running to and from the manifold uses part of each circuit.
Choosing a system for a renovation
In an existing home, every millimetre of height has to be absorbed at doors, thresholds, stair nosings and where the heated floor meets an unheated one. A screed usually means trimming doors and ramping thresholds. A dry panel is thin enough that a few millimetres of floor finish often decides whether doors need trimming at all. Measure the lowest door clearance and the step at each threshold before you choose.
Weight and drying time differ too. A wet screed weighs about 120 kg/m² and has to dry before the floor covering goes down. HOYA Ondol panels weigh 11.2–16.68 kg/m², and the covering can follow once the pipe passes its pressure test. In-slab heating suits new builds only, because the pipe is cast into the slab. See how the three compare for adding floor heating to an existing home.
In-slab or dry panel?
In-slab heating and a dry panel system both run warm water through pipe under the floor. The difference is where the pipe sits, and that decides when each one can be used and how quickly the floor responds.
In-slab
- Where the pipe goes: tied to the steel mesh before the slab is poured
- Suits: new homes on a new slab only
- Added height: none
- Response: the slab holds a lot of heat, so it is slow to warm up and slow to cool down, and is usually left running through winter
HOYA Ondol dry panels
- Where the pipe goes: pressed into grooved panels laid on the slab or subfloor
- Suits: new homes and existing floors
- Added height: 27.7 mm including the foil underlay, plus the floor finish
- Drying time: none. The floor covering can follow once the pipe passes its pressure test
How quickly the floor warms up
Independent studies have found that lighter floors without a thick screed warm up and respond faster. A modelling study in the REHVA Journal (2018) found a thin dry system reached the target floor temperature about three times faster than a 65 mm screed. A two-room test published in Buildings (2024) found a dry floor surface settled in about 120 minutes, against about 180 minutes for a concrete-filled floor.
Faster response matters most in a home that is heated only when people are in it. Energy use depends more on insulation, glazing and controls than on the floor type. These studies did not test HOYA Ondol panels. We summarise them on our floor heating research page.
What affects the cost
Every floor is different, so we quote each one from your plans. These are the things that move the price of any floor heating system:
- Floor area and zones: how much floor is heated, and how many rooms you want to control separately.
- The heat source: a heat pump or an electric boiler, sized to the home's heat load.
- Preparation: screed or compound pours and drying time, levelling, and trimming doors and thresholds.
- Access: work under a suspended floor depends on the clearance underneath.
- The floor finish: many floor heating quotes leave it out, so check what each quote includes before you compare them.
Building code notes
- Under the NCC Housing Provisions (13.2.6 in NCC 2022), a concrete slab-on-ground with in-slab or in-screed heating must have at least R1.0 water-resistant insulation around its vertical edge, at least 300 mm deep or the full depth of the slab edge. In-screed heating used only in a bathroom or similar area is exempt. In colder climate zones (6 to 8) there are also under-slab insulation requirements.
- NCC 2025 is being adopted state by state from 1 May 2026, and some states remain on NCC 2022 for now.
- HOYA Ondol is supplied for houses. In apartments and other Class 2 to 9 buildings, floor coverings must meet the NCC's fire-hazard requirements, so check with the building surveyor.
- The NCC does not set a minimum screed thickness.
- Your builder or certifier confirms what applies to your project.
Installation note. The panels can be laid by a builder, carpenter or flooring installer, following HOYA Ondol’s installation instructions and the panel and pipe layout designed for your floor, working with your hydronic installer. Manifold, heat pump or boiler connections must be made by a licensed plumber, and electrical work by a licensed electrician. In some states, laying the heating pipe itself is also licensed plumbing work, so check with your installer. Warranty requires licensed connections. This does not limit your rights under the Australian Consumer Law.
Find out what your floor needs
Send us your floor plans and tell us which rooms to heat. We design the panel and pipe layout, confirm the build-up height for your floor finish, and quote the full system.